Puppy Linux on a computer without a hard drive (on a USB stick!)
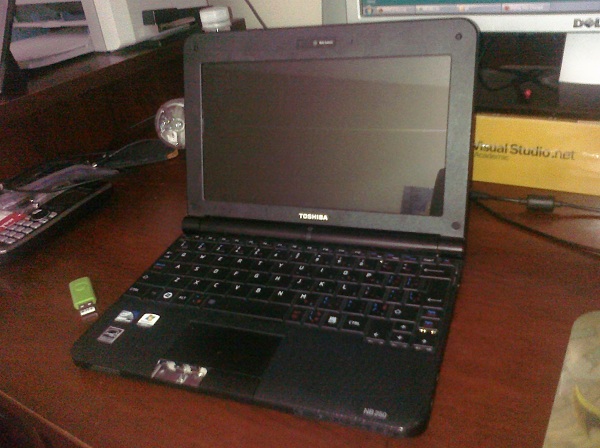
I recently got a netbook computer for free, with the catch being that it didn't come with a hard drive. Otherwise, it's an OK computer. The left click was pretty much ruined, so I removed the plastic cover, and am now pushing the button mechanism directly with my finger. The second free thing I obtained was a 2Gb cool green USB stick.
This was the first time I tried to set up a USB-based OS and it worked like a charm. I knew that given the coolness factor of the project, Linux developers would probably think of being able to install on an USB before Windows developers! I'm not saying Windows isn't cool, but Linux is THIS type of cool.
Did my research, and stumbled upon Puppy Linux. The author is completely obsessed with dogs, and the novelty of his naming convention (all tools have dog-related names) wore off pretty quickly. The Puppy distribution emphasizes ease of use over security and flexibility, making it perfect for my project. Here is roughly what I've done in order to end up with a computer which
- does not use a hard drive
- can access the Internet
- has a working ftp server (so things can be copied onto it easily)
- has a bunch of emulators so I can play games on it
- is extremely quiet (no hard drive to add to the internal temperature)
I used Puppy Linux codenamed Slacko 5.3 MAIN. If you wish to get it for yourself, look for a file named slacko-5.3-MAIN2.iso. They have multiple install types of each version, so make sure to go with a MAIN one. It's quite small in size, at 140Mb.
Next thing I did once I had the ISO was to burn it to a CD.
The netbook didn't have a CD drive, so I used a second computer. I booted the Puppy CD, and the OS loaded without a hitch. Fortunately, it had the tools needed to create the bootable USB.
First, the USB has to be made bootable. For this, I used the tool called BootFlash:

Then, the OS had to be transferred onto the USB stick. The tool for this is called Puppy universal installer:

Once this was done, the CD could be discarded, as the USB stick contained everything needed to operate the computer!
After booting from the USB, there are a few things to configure, in order to make it more pleasant:
- increase user file size (mine is comfortable at 768Mb). This file will contain everything you install, configure, or create, as far as the filesystem is concerned
- setup file sharing (via ftpd)
Try to install PET packages only, if you can find versions of them. They are extremely simple to install (click to install in Iceweasel browser).
That's about it. It was a fun project, which I've kept around to sometimes play older games. There's a nice emulator suite for Puppy, which is called Puppy Arcade. Here's a screenshot of Dosbox running Prince of Persia, alongside Gens running my Genesis video poker game Genpoker.

This was the first time I tried to set up a USB-based OS and it worked like a charm. I knew that given the coolness factor of the project, Linux developers would probably think of being able to install on an USB before Windows developers! I'm not saying Windows isn't cool, but Linux is THIS type of cool.
Did my research, and stumbled upon Puppy Linux. The author is completely obsessed with dogs, and the novelty of his naming convention (all tools have dog-related names) wore off pretty quickly. The Puppy distribution emphasizes ease of use over security and flexibility, making it perfect for my project. Here is roughly what I've done in order to end up with a computer which
- does not use a hard drive
- can access the Internet
- has a working ftp server (so things can be copied onto it easily)
- has a bunch of emulators so I can play games on it
- is extremely quiet (no hard drive to add to the internal temperature)
Step 1 - obtaining the OS
I used Puppy Linux codenamed Slacko 5.3 MAIN. If you wish to get it for yourself, look for a file named slacko-5.3-MAIN2.iso. They have multiple install types of each version, so make sure to go with a MAIN one. It's quite small in size, at 140Mb.
Next thing I did once I had the ISO was to burn it to a CD.
Step 2 - creating a USB stick-based install
The netbook didn't have a CD drive, so I used a second computer. I booted the Puppy CD, and the OS loaded without a hitch. Fortunately, it had the tools needed to create the bootable USB.
First, the USB has to be made bootable. For this, I used the tool called BootFlash:
Then, the OS had to be transferred onto the USB stick. The tool for this is called Puppy universal installer:
Once this was done, the CD could be discarded, as the USB stick contained everything needed to operate the computer!
Step 3 - configuring Puppy Linux
After booting from the USB, there are a few things to configure, in order to make it more pleasant:
- increase user file size (mine is comfortable at 768Mb). This file will contain everything you install, configure, or create, as far as the filesystem is concerned
- setup file sharing (via ftpd)
Try to install PET packages only, if you can find versions of them. They are extremely simple to install (click to install in Iceweasel browser).
That's about it. It was a fun project, which I've kept around to sometimes play older games. There's a nice emulator suite for Puppy, which is called Puppy Arcade. Here's a screenshot of Dosbox running Prince of Persia, alongside Gens running my Genesis video poker game Genpoker.